Toilet Leaking at the Base: Causes and How to Fix It
Home »

What to Do When Your Toilet Is Leaking at the Base
A toilet leaking at the base is one of the most common, and most damaging, plumbing problems a homeowner can face. That puddle on your bathroom floor is not just an inconvenience. It is dirty wastewater escaping from beneath your toilet, and every single flush makes the situation worse.
Here is a quick summary of the most important things to know:
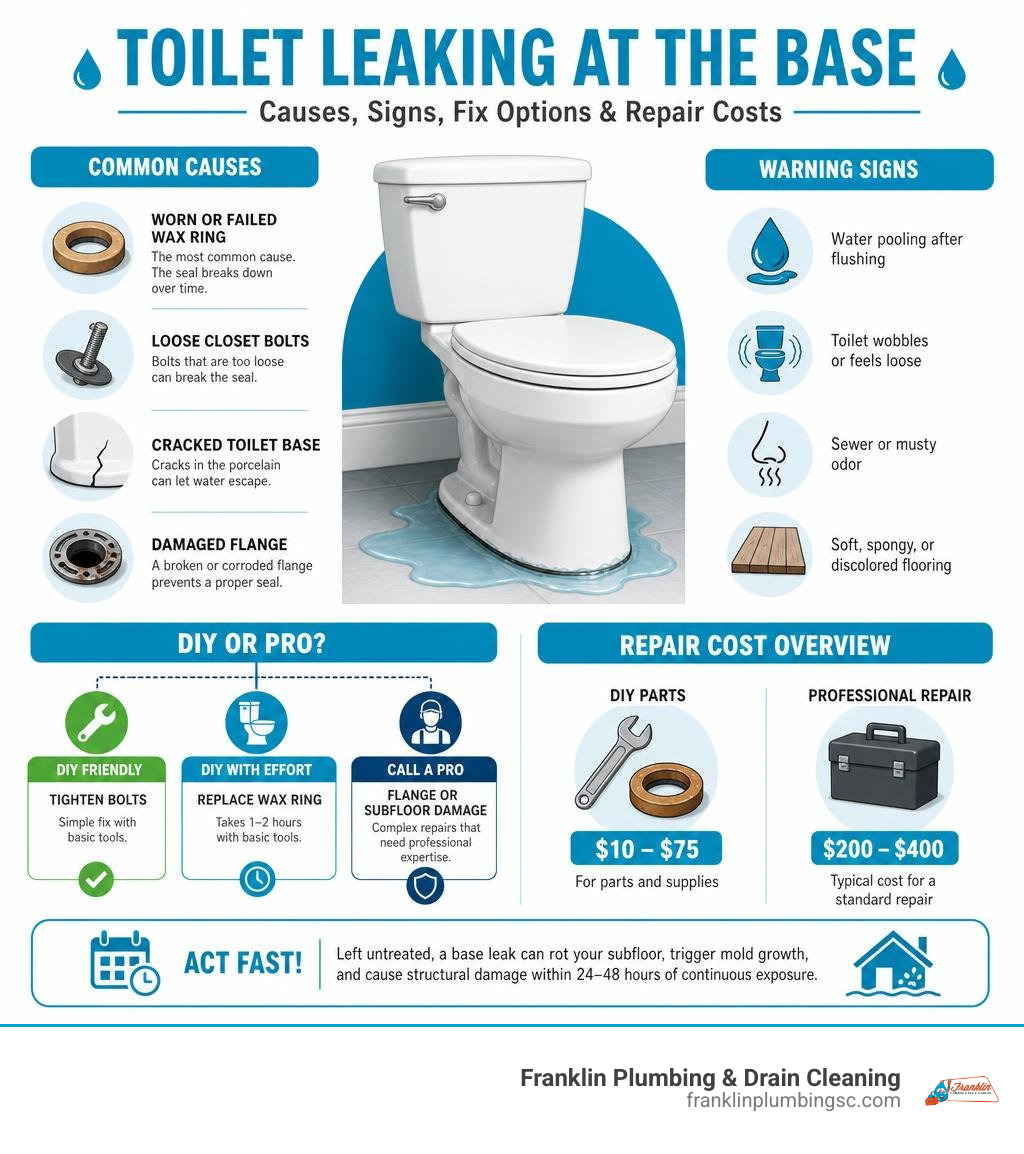
- Most common cause: A failed wax ring, which serves as the crucial seal between the toilet and the drain pipe
- Other causes: Loose closet bolts, a cracked toilet base, or a damaged flange
- Key warning signs: Water pooling after flushing, toilet wobbles, sewer smell, soft or discolored flooring
- DIY or pro? Tightening bolts is a simple DIY fix. Replacing the wax ring takes about 1 to 2 hours with basic tools. Flange or subfloor damage usually needs a professional.
- Cost: Repair costs can vary depending on the severity of the damage, but basic DIY parts are generally inexpensive, while professional repairs remain highly cost-effective compared to structural restoration.
- Act fast: Left untreated, a base leak can rot your subfloor, trigger mold growth, and cause structural damage within 24 to 48 hours of continuous exposure.
The good news is that most base leaks are fixable without panic. This comprehensive guide walks you through every cause, every fix, and every situation where you should pick up the phone to call a professional instead of grabbing a wrench.
Why is Your Toilet Leaking at the Base?
When you notice water pooling around the bottom of your toilet, it is vital to understand that this is not clean tap water. This is wastewater that has already been inside the toilet bowl. Every time you flush, pressure forces water down the drain, and if the seal beneath the toilet is broken, a small amount of that dirty water escapes onto your floor.
To keep your home healthy and dry, we recommend reviewing our essential plumbing maintenance checklist to catch these issues before they turn into expensive structural disasters. Leaving water to pool at the base of your toilet can quickly rot your subfloor, create a breeding ground for mold, and allow toxic sewer gases to seep into your living space. Let us look at the primary reasons why this leak occurs.
Worn Wax Ring
The wax ring is the unsung hero of your bathroom plumbing. Positioned directly between the bottom of the toilet bowl (the horn) and the floor drain (the flange), this simple wax ring creates a completely airtight and watertight seal.
While a high-quality wax ring has a typical lifespan of 20 to 30 years, several factors can cause it to fail prematurely:
- Age and Deterioration: Over several decades, the wax can dry out, shrink, or crumble.
- Toilet Movement: If the toilet is not anchored securely to the floor, any rocking or shifting will break the wax seal. Once a wax ring is compressed and deformed by movement, it cannot spring back into shape.
- Temperature Swings: Extreme heat or cold can cause the wax to lose its structural integrity.
When the wax seal fails, you will often notice a persistent, unpleasant sewer odor in your bathroom before you even see standing water.
Loose Closet Bolts
Closet bolts, also known as tee bolts, are the two brass or steel bolts located on either side of your toilet base. These bolts anchor the porcelain toilet base directly to the metal or plastic flange in your floor.
If these bolts become loose over time, the toilet will begin to rock or wobble when people sit on it. This minor movement is incredibly destructive to your wax ring. Every time the toilet shifts, it pinches and breaks the wax seal, allowing water to escape.
However, you must be extremely careful when dealing with loose bolts. Overtightening them can easily crack the fragile porcelain base of your toilet, which is one of the most common habits that can damage your plumbing system and will force you to purchase an entirely new toilet.
Cracked Toilet Base or Flange
In some cases, the leak is not caused by a failed seal but by structural damage to the toilet itself or the underlying plumbing connection.
- Cracked Porcelain Base: Hairline cracks can develop in the porcelain bowl or base due to age, physical impacts, or overtightened bolts during a previous installation. These cracks can slowly weep water onto the floor every time the toilet is used.
- Damaged Toilet Flange: The flange is the fitting that connects the toilet to the sewer line. Older homes in Columbia, SC often have cast iron flanges that rust and crack over time. Modern homes typically use plastic PVC flanges, which can crack if the toilet is installed improperly or if the floor settles unevenly. If the flange is broken, it cannot hold the closet bolts tightly, leading to a broken wax seal and a persistent leak.
How to Diagnose the Source of the Leak
Before you start tearing your toilet off the floor, you need to make sure the water is actually coming from the base. Water obeys gravity, meaning a leak from higher up on the toilet can easily run down the porcelain and pool on the floor, mimicking a base leak.
Unaddressed moisture from a toilet leaking at the base can lead to severe floor rot, toxic mold growth, and deep structural damage. To rule out system-wide pressure issues that might be stressing your fixtures, read about how excessive water pressure affects your home’s plumbing.
How to Diagnose a Toilet Leaking at the Base
To confirm exactly where your leak is coming from, follow this simple diagnostic process:
- Dry the Entire Toilet: Take a dry rag or microfiber towel and wipe down the entire toilet. Clean the tank, the supply line, the flush valve connection, the bowl, and the floor around the base until everything is bone dry.
- Perform the Paper Towel Test: Lay dry paper towels flat on the floor around the base of the toilet. Also, wrap a paper towel around the water supply line connection and the tank-to-bowl bolts.
- Run a Flush Test: Flush the toilet and watch the paper towels closely. If the paper towels around the floor base get wet immediately after flushing, but the towels higher up remain dry, you have a confirmed base leak.
- The Food Coloring Test: If you suspect a slow, constant leak rather than a flush-only leak, drop 10 to 15 drops of dark food coloring (like blue or red) into the toilet bowl. Do not flush. If colored water begins to seep out onto the floor over the next hour, you have a confirmed leak coming from beneath the toilet bowl.
Condensation vs. Active Leak
During hot, humid South Carolina summers, a puddle around your toilet base might not be a leak at all. It could simply be condensation, often referred to as a “sweating” toilet.
When cold water fills the toilet tank and bowl, the humid bathroom air hits the cold porcelain surface, causing moisture to condense and drip down to the floor.
To determine if you are dealing with condensation or a true leak:
- Check the Weather: Condensation is highly common in poorly ventilated bathrooms during high-humidity periods.
- Dry and Monitor: Dry the toilet completely and ventilate the bathroom by running the exhaust fan or opening a window. If the puddle stops forming once the room is dry and ventilated, condensation is your culprit.
- Insulate: If sweating is a constant issue, you may need to install a toilet tank insulation kit or upgrade your bathroom ventilation.
Tools and Materials Needed for the Repair
If you have confirmed that your wax ring needs to be replaced, you will need to gather a few essential tools and materials before you begin. Having everything ready beforehand ensures your bathroom is not out of commission for longer than necessary.

Here is what you will need:
- Adjustable Wrench: To loosen the water supply line and the closet bolts.
- Putty Knife: To scrape away the old, sticky wax from the flange and the bottom of the toilet.
- Hacksaw: In case your old closet bolts are too rusted or corroded to unscrew, you will need to cut them off.
- New Wax Ring or Wax-Free Seal: The replacement seal.
- New Closet Bolts: Always replace the old bolts with new brass bolts to prevent future corrosion.
- Plastic Shims: To level the toilet if your floor is uneven.
- Silicone Caulk: To seal the base of the toilet to the floor after installation.
- Cleaning Supplies: Disinfectant spray, rubber gloves, rags, and a bucket.
When purchasing a new seal, you can choose between a traditional wax ring and a modern wax-free rubber seal. Here is how they compare:
| Feature | Traditional Wax Ring | Wax-Free Rubber Seal |
|---|---|---|
| Material | Solid sticky petroleum wax | Flexible rubber or foam |
| Lifespan | 20 to 30 years (unless disturbed) | Highly durable, does not dry out |
| Ease of Installation | Requires precise placement; one-shot install | Reusable and repositionable during install |
| Cost | Very inexpensive | Slightly more expensive |
| Best For | Standard flange heights | Uneven floors or DIY beginners |
Step-by-Step Guide to Replacing a Wax Ring
Replacing a wax ring is an intermediate DIY project that takes about one to two hours. If you are comfortable lifting a heavy porcelain fixture (toilets weigh between 50 and 100 pounds), you can save money by doing this yourself.
Step-by-Step Guide to Fixing a Toilet Leaking at the Base
Step 1: Turn Off the Water and Drain the Toilet
Locate the water shutoff valve on the wall behind the toilet and turn it clockwise until it stops. Flush the toilet and hold the handle down to drain as much water as possible from both the tank and the bowl. Use a large sponge or dry towels to soak up any remaining water left in the bottom of the bowl and the tank. If you do not remove all the water, it will spill onto your floor when you lift the toilet.
Step 2: Disconnect the Water Supply Line
Using an adjustable wrench, unscrew the water supply line from the bottom of the toilet fill valve. Keep a small bucket or towel handy to catch any residual water dripping from the line.
Step 3: Remove the Closet Bolts
Pop off the plastic cap covers at the base of the toilet. Use your wrench to remove the nuts and washers from the closet bolts. If the bolts spin in place or are completely rusted shut, use a hacksaw to carefully cut the bolts off just below the nut. Be careful not to nick the porcelain base with the saw blade.
Step 4: Lift and Remove the Toilet
Carefully lift the toilet straight up off the floor flange. It is best to lift from the bowl rather than the tank to avoid cracking the seal between the tank and bowl. Set the toilet gently on its side on a pile of old towels or cardboard to protect your bathroom floor and the porcelain.
Step 5: Scrape and Clean the Old Wax
Put on your rubber gloves. Using your putty knife, scrape all of the old, sticky wax off the bottom of the toilet bowl (the horn) and the floor flange.
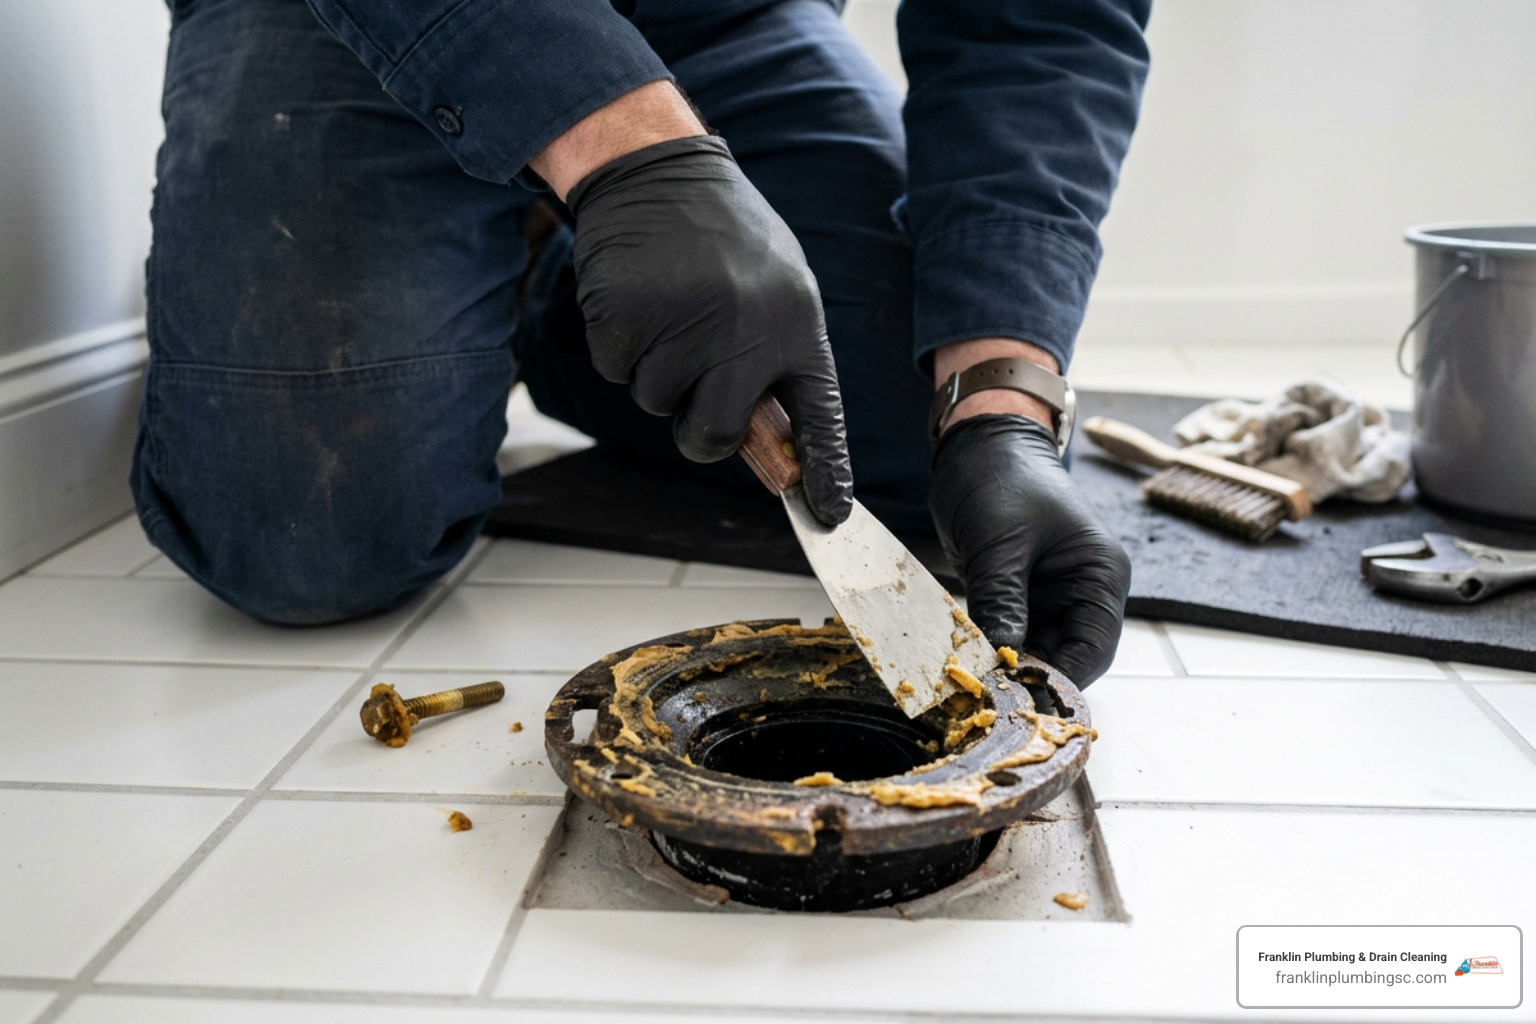
Ensure both surfaces are completely clean and dry. Once the wax is removed, stuck a rag into the open drain pipe. This is a crucial safety step that prevents toxic, flammable sewer gases from entering your home and keeps you from accidentally dropping tools down the sewer line.
Reinstalling and Caulking the Toilet
Step 6: Install the New Seal and Bolts
Insert your new brass closet bolts into the slots on the floor flange, ensuring they point straight up. Remove the rag from the drain pipe. If you are using a traditional wax ring, press the wax ring firmly onto the bottom outlet (horn) of the toilet bowl, or place it directly centered on the floor flange.
Step 7: Set the Toilet
Carefully lift the toilet and hover it directly over the flange. Align the holes in the toilet base with the upright closet bolts. Lower the toilet straight down. Once the toilet makes contact with the wax ring, press down firmly with your body weight to compress the wax and create a solid seal. Do not rock or twist the toilet after setting it, as this will ruin the seal.
Step 8: Tighten the Bolts
Place the plastic washers, metal washers, and nuts onto the bolts. Tighten the nuts alternating from side to side to ensure even pressure. Tighten them until they are snug, but do not overdo it. Overtightening will crack the porcelain bowl. To avoid other common plumbing mishaps, check out our guide on things you should stop doing to protect your plumbing.
Step 9: Level and Test the Toilet
If the toilet rocks or your floor is uneven, slide plastic shims under the base to level it before tightening the bolts completely. Cut off any excess shim material with a utility knife. Reconnect the water supply line, turn the water valve back on, and let the tank fill. Flush the toilet several times while inspecting the base with a dry paper towel to ensure the leak is completely resolved.
Step 10: Apply Silicone Caulk
Once you are 100% sure there are no leaks, apply a clean bead of silicone caulk around the base of the toilet where it meets the floor. This is required by plumbing codes to keep water from mopping or tub splashes from seeping under the toilet. However, always leave a small gap uncaulked at the very back of the toilet base. If the wax seal ever fails in the future, this open gap allows the leaking water to escape onto your floor where you can see it, rather than trapping the dirty water underneath and rotting your subfloor in secret.
When to Repair the Flange or Address Subfloor Damage
Sometimes, a simple wax ring replacement is not enough. When you lift your toilet, you might discover that the underlying flange is broken or the wood subfloor beneath is soft and rotted.
These issues must be resolved before you can safely reinstall your toilet.
Repairing or Replacing a Damaged Flange
A properly functioning flange should sit exactly 1/4 inch above the finished floor height. If you recently installed new, thicker flooring (like tile or luxury vinyl plank) in your Columbia, SC home, your flange might now sit flush with or below the floor level. This is a common cause of recurring leaks because a standard wax ring cannot bridge that gap.
- If the Flange is Too Low: You can install a flange extender or use an extra-thick wax ring to ensure a tight seal.
- If the Flange is Cracked or Broken: If a plastic or cast iron flange is cracked, you do not necessarily have to cut out the entire drain pipe. You can install a metal flange repair ring (often called a repair plate) over the existing flange. This repair ring screws directly into your subfloor and provides a strong, new slot to anchor your closet bolts.
- Cast Iron Flanges: If you live in an older home in West Columbia, SC or Forest Acres, SC with original cast iron plumbing, a damaged flange can be incredibly difficult to repair on your own. Replacing cast iron connections safely usually requires professional tools and expertise.
Identifying and Fixing Subfloor Rot
If your toilet has been leaking for weeks or months, the water has likely soaked into the surrounding floor. Look out for these signs of subfloor damage once the toilet is removed:
- Soft, Spongy Wood: Press a screwdriver into the wood surrounding the drain pipe. If the wood feels soft, crumbles, or sinks, it is rotted.
- Discoloration and Mold: Dark black or gray staining on the wood indicates advanced water saturation and mold growth.
- Musty Odors: A damp, musty smell that persists even after cleaning is a major warning sign of hidden rot.
If the subfloor is structurally compromised, you cannot simply reinstall the toilet. The bolts will not hold, and the toilet will wobble, immediately breaking your new wax seal. Rotted subfloor sections must be cut out and replaced with new plywood, and the floor joists beneath must be inspected for structural integrity.
Frequently Asked Questions
Is a toilet leaking at the base an emergency?
Yes, a base leak is considered an urgent plumbing issue. Because the leaking water is contaminated wastewater, it poses immediate health risks and can cause wood rot, mold growth, and structural subfloor damage within 24 to 48 hours of continuous exposure.
Why does my toilet only leak when flushed?
This pattern occurs because wastewater only flows past the wax seal during a flush. When you flush, a large volume of water is forced down the drain under pressure. If the wax ring or flange is damaged, the water escapes through the broken seal onto your floor.
Can I fix a leaking toilet base without removing the toilet?
Only if the leak is coming from loose closet bolts or a water supply line connection. If the leak is originating from a broken wax ring or a damaged flange underneath the bowl, the toilet must be completely removed to replace the seal.
How much does it cost to fix a toilet leaking at the base?
The cost to fix a toilet leaking at the base can vary depending on the extent of the damage. Basic DIY replacement parts are generally very affordable, while professional repair costs will depend on whether the flange or subfloor also requires attention. Requesting a professional estimate is the best way to get an accurate price.
Should I use a wax ring or a wax-free seal?
Traditional wax rings are highly reliable, inexpensive, and have been the industry standard for decades. Wax-free rubber seals are slightly more expensive but are cleaner to handle, easier for DIY beginners to install, and can be repositioned during installation.
Can a leaking toilet cause structural floor damage?
Absolutely. Over time, water seeping from a leaking toilet base will soak into the wooden subfloor and support joists. This leads to dry rot, wood decay, and structural sagging, which can eventually cause the toilet to sink or fall through the floor.
How long does a toilet wax ring typically last?
A high-quality wax ring can last between 20 and 30 years. However, toilet movement, floor settling, hard water minerals, and high humidity can cause the wax to dry out or break much sooner, requiring replacement every 8 to 12 years.
Should I caulk all the way around the toilet base?
No. You should caulk around the front and sides of the toilet base to meet local plumbing codes, but always leave a small gap uncaulked at the very back. This gap allows water from a future leak to escape onto the floor where you can see it, rather than trapping it underneath to rot your floor.
What should I do if my toilet rocks or wobbles?
A rocking toilet will quickly break your wax seal. Inspect the closet bolts to see if they need tightening, but do not overtighten them. If the floor is uneven, insert plastic shims under the toilet base to level it, then tighten the bolts until snug.
When should I call a professional plumber to fix a leaking toilet?
You should call a professional plumber if the floor beneath the toilet feels soft or rotted, if the metal or plastic floor flange is cracked or recessed too deep, if you have old cast iron pipes, or if the toilet continues to leak after you have replaced the wax ring.
Conclusion
A toilet leaking at the base is not a project you want to put off. What starts as a tiny puddle on your bathroom floor can quickly evolve into a costly structural repair involving mold remediation and subfloor replacement. While tightening loose bolts or replacing a basic wax ring are manageable tasks for a handy homeowner, more complex issues like a broken cast iron flange or a rotted subfloor require expert intervention.
If you are dealing with a stubborn leak, a wobbling toilet, or structural floor damage in Columbia, SC or the surrounding areas, let the team at Franklin Plumbing & Drain Cleaning handle the dirty work for you. Our licensed, experienced technicians service homeowners across West Columbia, SC, Arcadia Lakes, SC, Blythewood, SC, St. Andrews, SC, Cayce, SC, and Lexington, SC with a 100% satisfaction guarantee.
Do not let a minor leak turn into a major headache. Contact us today to schedule our professional leak detection services and restore peace of mind to your home.

professional
drain cleaning

highly
recommended

through
repairs

quality
work