
How to Perform Pressure Drop Leak Detection in 5 Easy Steps
Home »
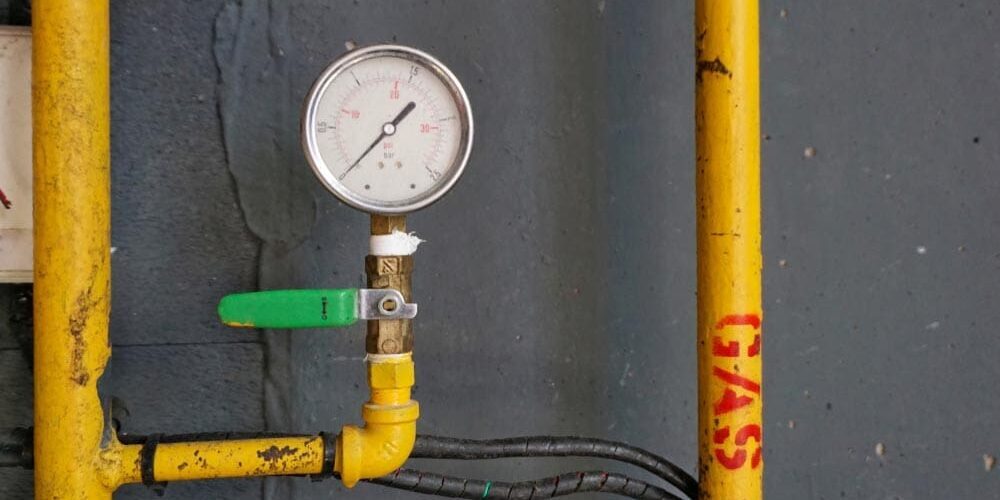
A Quick Guide to Pressure Drop Leak Detection
Pressure drop leak detection checks whether an isolated, pressurized pipe or component loses pressure over a set time. If the pressure falls after the system has stabilized and no water is being used, it can point to a leak, a loose connection, or a testing issue that needs a closer look.
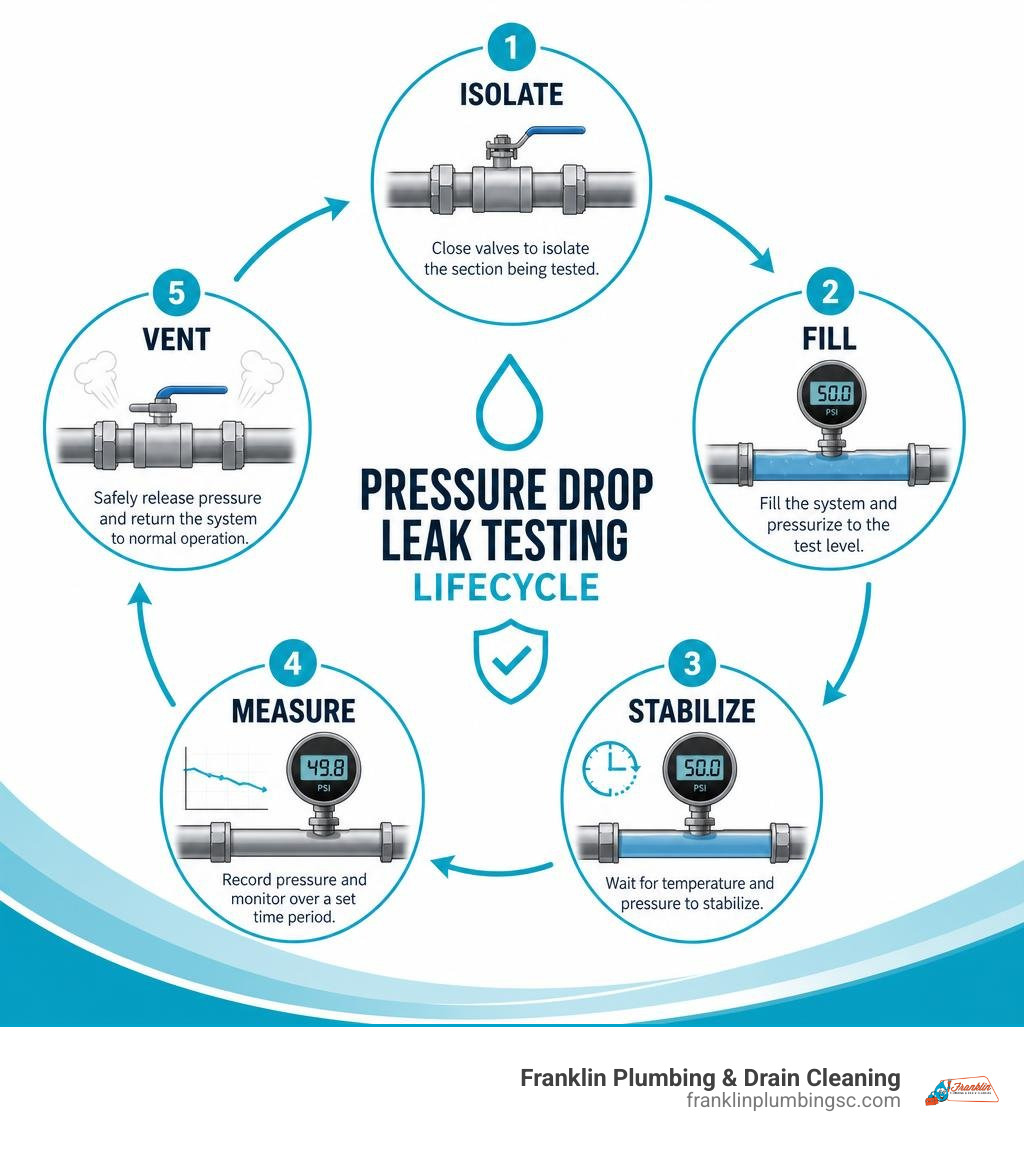
For a quick troubleshooting answer:
- Isolate the section of plumbing being tested.
- Fill it to a safe, appropriate test pressure.
- Wait for the pipe, air, and water temperature to settle.
- Record the pressure over a timed test period.
- Investigate a meaningful pressure drop after ruling out temperature change, trapped air, and valve leakage.
This method is useful because it can confirm that a hidden leak may exist without opening walls, floors, or landscaping first. But a pressure loss does not always mean a pipe is leaking. Cooling temperatures, flexible pipe expansion, moisture changes, and a valve that does not seal fully can all create misleading results.
For busy home and business owners, the goal is simple: determine whether the pressure change is real, then use the right diagnostic method to find the source with as little disruption as possible. The Franklin Plumbing & Drain Cleaning team can explain what pressure-based testing can reveal and where it can fall short.
Understanding Pressure Drop Leak Detection vs. Alternative Methods
When evaluating pipe integrity, technicians rely on several diagnostic techniques. Pressure drop leak detection (also called pressure decay testing) stands out because it measures the physical retention of gas or liquid within an isolated volume. Rather than searching for an acoustic sound frequency or detecting gas molecules in open space, pressure decay monitors internal pressure over a designated timeframe.
Different leak testing methodologies offer varying degrees of sensitivity, test speed, and application suitability. For instance, high-precision industrial applications or specialized laboratory tests might use tracer gases like helium, while municipal pipe networks and residential plumbing systems frequently rely on hydrostatic decay tests or acoustic listening devices.
| Method | Operating Principle | Typical Sensitivity Range | Primary Advantage | Best Application |
|---|---|---|---|---|
| Pressure Decay | Measures pressure drop in isolated volume | Moderate ($10^{-5} \text{ Pa}\cdot\text{m}^3/\text{s}$) | Fast, non-destructive, cost-effective | Residential plumbing lines, gas piping, quality control |
| Helium Mass Spectrometry | Detects tracer gas passing through breaches | Extremely High ($10^{-11} \text{ Pa}\cdot\text{m}^3/\text{s}$) | Identifies ultra-fine micro-leaks | Hermetic seals, medical devices, vacuum systems |
| Acoustic Emission | Listens for sound vibrations made by escaping fluid | Variable based on soil and pipe diameter | Non-invasive ground pin-pointing | Underground supply mains, municipal networks |
| Differential Pressure | Compares test volume against reference volume | High ($10^{-6} \text{ Pa}\cdot\text{m}^3/\text{s}$) | Mitigates minor ambient temperature noise | Precision valve manufacturing, small vessels |
For homes and commercial properties, professional leak detection services can pair pressure testing with acoustic location methods when a pressure drop suggests a hidden problem.
Pressure Drop Test vs Pressure Rise Test
Pressure-based integrity testing comes in two primary forms: pressure drop (decay) testing and pressure rise testing. The fundamental difference lies in whether the test envelope operates above or below ambient atmospheric pressure.
In a pressure drop test, we pressurize the interior of the system above atmospheric pressure using air, nitrogen, or water. We then seal the supply source and monitor the gauge. If the gauge pressure falls over time, fluid is escaping through a leak point into the surrounding environment.
In a pressure rise test, the system operates under a vacuum. We evacuate the test vessel below atmospheric pressure, isolate the vacuum pump, and watch the gauge. If the internal pressure rises toward atmospheric pressure, external air is entering the system.
Vacuum pressure rise testing is standard in laboratory equipment and sealed vacuum vessels. However, standard flange connections and residential pipe fittings are designed primarily for internal positive pressure and cannot withstand high vacuum conditions without seal distortion. Therefore, positive pressure drop testing remains the standard for residential water, sewer, and gas pipe systems across Columbia, SC, and surrounding communities such as Lexington, SC, and Irmo, SC.
Calculating Leak Rates from Pressure Measurements
Calculating the quantitative leak rate from a pressure drop reading relies on the ideal gas law. By tracking how much pressure drops over a specific duration across a known internal volume, we can calculate the exact volumetric loss rate.
The basic mathematical formula for calculating leak rate is:
$$q_L = V \times \frac{\Delta P}{\Delta t}$$
Where:
- $q_L$ represents the leakage rate (expressed in $\text{mbar}\cdot\text{L/s}$ or standard cubic centimeters per minute).
- $V$ represents the total internal volume of the isolated pipe or vessel (in liters).
- $\Delta P$ represents the measured pressure change during the test window.
- $\Delta t$ represents the total measurement duration (in seconds).
For liquid-filled hydrostatic tests, because water is far less compressible than air, even a tiny volume loss causes a rapid drop in gauge pressure. This makes hydrostatic pressure drop testing remarkably sensitive for spotting minor water leaks in domestic supply lines.
How to Execute Pressure Drop Leak Detection in 5 Easy Steps

Performing a successful pressure decay test requires strict adherence to sequential steps. Rushing the process or skipping stabilization can lead to inaccurate readings, causing technicians to misdiagnose tight pipes as leaking or miss subtle pinhole breaches.
Below is the standard 5-step workflow used by professional technicians to isolate, pressurize, stabilize, measure, and verify pipe system integrity.
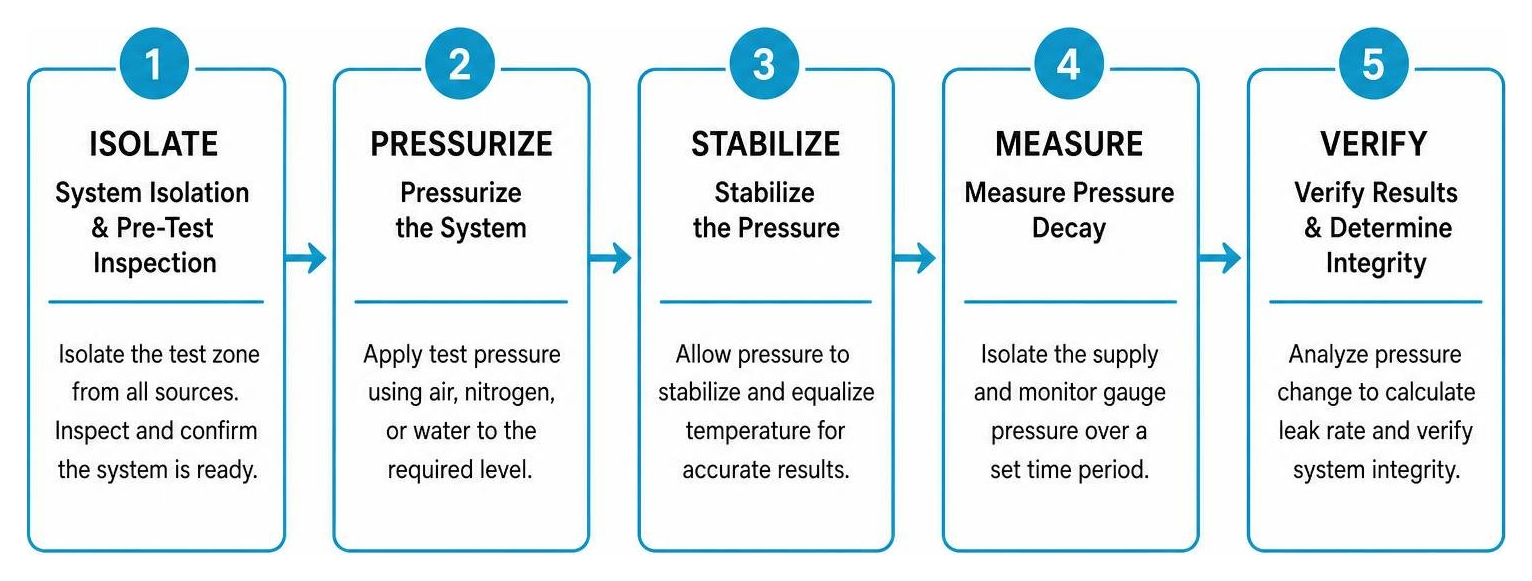
Step 1: System Isolation and Pre-Test Inspection
Before applying pressure, you must completely isolate the test zone from external sources, water mains, fixtures, and appliances.
- Turn off main shutoff valves, appliance supply stops, and fixture supply lines.
- Disconnect sensitive equipment, such as water heaters or water filtration units, that could be damaged by test pressures.
- Inspect exposed fittings, valve packings, and test manifolds for visible moisture or corrosion.
- Verify that isolation valves seal completely. An internal valve passing water or air will mimic a pipe leak during testing.
Warm flooring, unexplained wall moisture, or a continuously moving water meter can signal a hidden issue. Our article on signs of a hidden water leak explains what homeowners can watch for before arranging diagnostic testing.
Step 2: System Pressurization and Pre-Filling
Once isolated, connect a test manifold equipped with a calibrated digital pressure gauge or transducer, a bleeding valve, and a pressure source (such as compressed air, inert nitrogen, or a manual hydrostatic hand pump).
- Select an appropriate test pressure based on local plumbing codes and material limits. Standard residential water distribution lines are typically tested at working pressure or slightly above (often 60 to 80 PSI for air decay, or up to 100 PSI for hydrostatic testing).
- Slowly open the regulator valve to inject the testing medium into the pipe section.
- Bleed out any trapped air pockets if performing a liquid hydrostatic test. Air trapped inside a liquid test loop acts like a spring, compressing under pressure and skewing the measurement.
- Bring the system smoothly up to the target set point without over-pressurizing.
Step 3: The Stabilization and Thermal Settlement Phase
The stabilization phase is crucial for accurate testing. Injecting gas or liquid into a closed line creates friction, compression heat, and mechanical expansion along pipe walls.
- Close the isolation valve on the test manifold to trap the test pressure inside the pipe segment.
- Allow a dedicated stabilization period (typically 10 to 15 minutes for small residential loops, or up to 30 minutes for large pipe segments).
- Observe how the pressure initial curve settles. As compressed air cools to match the pipe wall temperature, pressure drops slightly. This natural decay is normal and thermal, not a physical fluid leak.
- Begin the official test measurement period only after the temperature and pressure reach thermal equilibrium.
Step 4: Measuring Pressure Drop and Calculating Leak Rate
With the system stabilized, track the digital transducer readings over the official test duration (usually 15 to 30 minutes for standard code compliance tests).
- Record the baseline starting pressure ($P1$) at timestamp $T1$.
- Monitor the digital gauge continuously for unexpected drop-offs or rapid fluctuations.
- Record the final ending pressure ($P2$) at timestamp $T2$.
- Calculate the net difference ($\Delta P = P1 – P2$).
- Compare the measured drop rate against allowable tolerance standards. If the pressure remains rock-solid or stays within code-allowed limits, the section passes. If the decay continues steadily past allowable thresholds, a leak is confirmed.
Testing conditions can vary with pipe materials, soil temperature, and building layout. Our overview of leak detection in Columbia, SC describes how technicians evaluate those factors while narrowing down a suspected leak.
Step 5: System Venting and Diagnostics Verification
After recording the test data, de-energize the isolated pipe segment safely to complete the procedure.
- Slowly open the release valve on the manifold to discharge trapped pressure safely away from your face and eyes.
- Utilize fail-safe dual-valve vent configurations on test rigs to ensure venting air does not back-pressurize or bypass into adjacent active lines.
- Remove test fittings and reconnect all original fixtures, appliances, and main line supply connections.
- Restore normal water supply slowly, purging lingering air from household faucets to prevent water hammer.
Advanced Techniques for Troubleshooting Pressure Drop Leak Detection
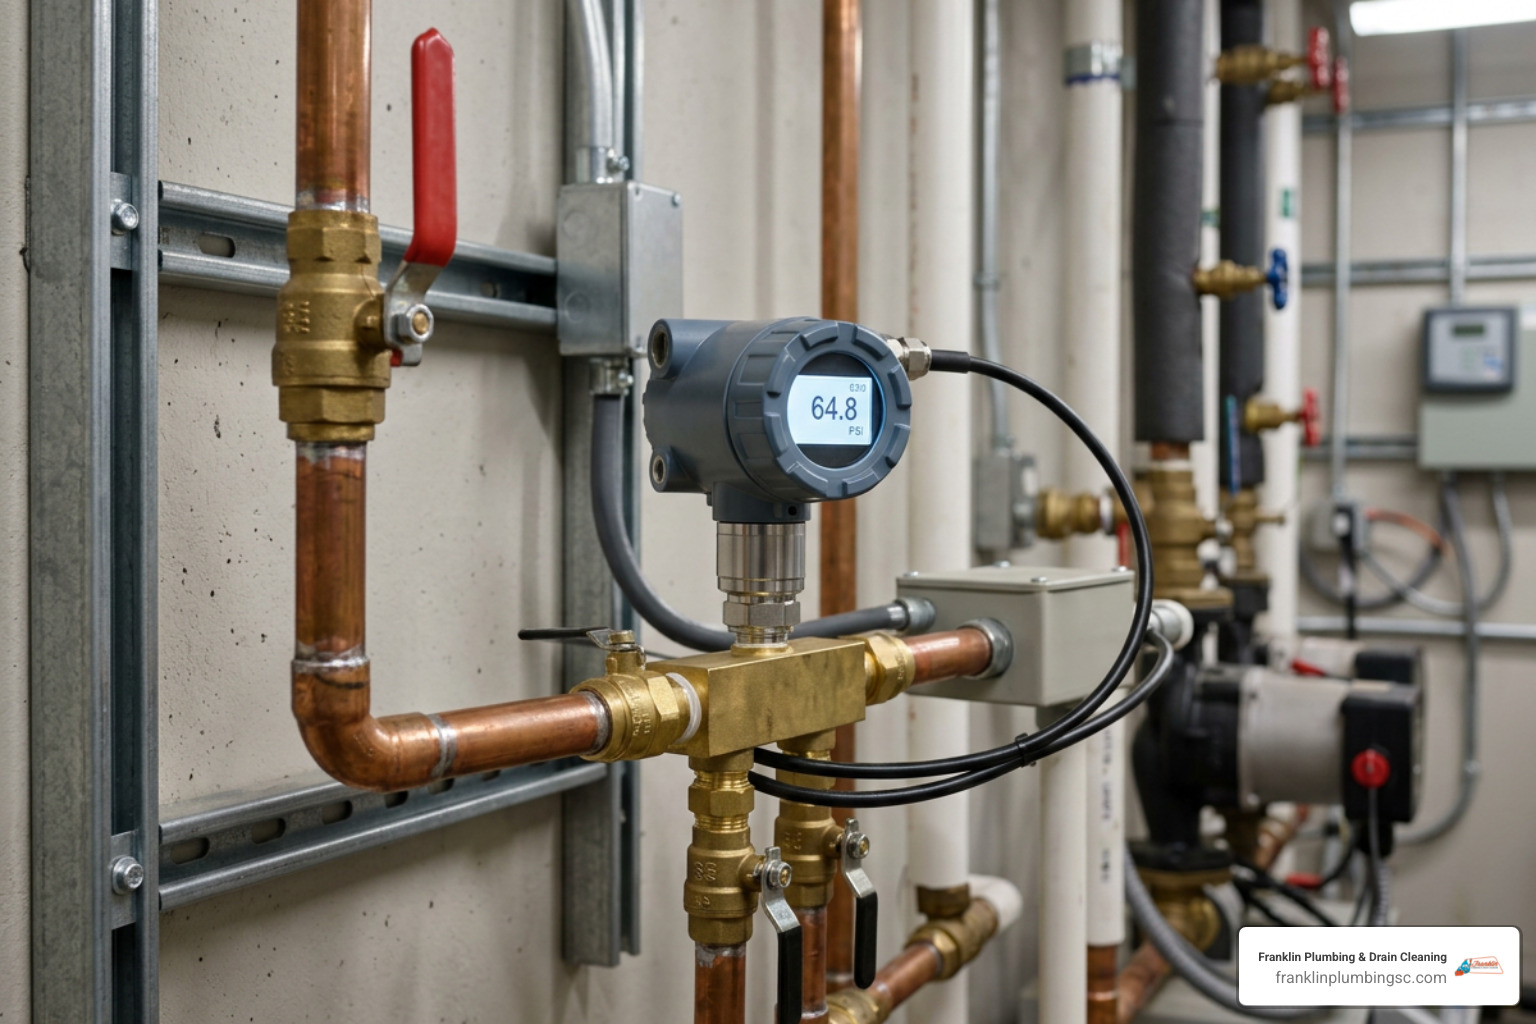
While pressure drop testing is straightforward in concept, real-world troubleshooting often introduces complications. Thermal fluctuations, material creep in flexible piping, trapped gas evolution, and subtle moisture condensation can distort decay readings, generating false positive leak reports.
Troubleshooting False Readings in Pressure Drop Leak Detection
Distinguishing between a true structural leak and environmental noise is a key skill for any diagnostic technician. Here are the primary culprits behind false pressure decay readings:
- Thermal Traps and Temperature Drops: According to Charles’s Law, gas pressure inside a closed volume drops as temperature falls. If warm compressed air is pumped into cold underground pipes beneath a slab in West Columbia, SC, or Chapin, SC, the cooling air causes a noticeable pressure drop even if the pipe is entirely watertight.
- Material Expansion (Creep): Flexible piping materials like PEX or HDPE expand mechanically when exposed to sustained internal pressure. This slight increase in total internal volume creates a temporary drop in static pressure. Pre-filling lines slightly above target pressure before starting the stabilization timer helps minimize this effect.
- Moisture Condensation: When performing pneumatic tests on large pipes or vessels, rapid pressure drops during filling can cause internal humidity to condense into liquid water. This phase change reduces overall gas volume, dropping gauge pressure artificially.
- Gas Evolution vs. Real Leaks: In evacuated or vacuum-tested lines, materials can release absorbed gas molecules, also called outgassing. To distinguish outgassing from a real leak, plot the pressure rise over time on a linear graph. A real leak produces a straight, constant linear incline, whereas outgassing creates a curve that gradually flattens as gas release reaches equilibrium.
Advanced Machine Learning in Pressure Drop Leak Detection
In industrial gas pipelines and municipal distribution grids, automated monitoring systems use intelligent algorithms to interpret pressure decay signals. Traditional automated valves used fixed drop rate triggers. However, static settings can miss small leaks or trigger false emergency shut-offs during routine compressor startups.
Modern SCADA systems can use machine learning frameworks, such as support vector machine classification, to analyze multi-variable pressure drop curves. Instead of reacting to pressure change alone, these systems compare pressure trends with operating conditions such as pump cycling, compressor activity, flow demand, and valve movement. This helps separate true leak patterns from normal transient pressure waves.
For residential and light commercial plumbing in the Columbia, SC, area, the same principle applies on a smaller scale: one pressure reading is rarely enough by itself. A professional technician looks at the pressure curve, test duration, temperature conditions, isolation quality, and pipe material before deciding whether the result indicates a real hidden leak or a testing artifact.
When the diagnosis points to a broader plumbing concern, our plumbing services in Columbia, SC can help address the underlying repair needs after the leak source is identified.
Infrastructure Applications: Pressure Management and NRW Control
Pressure drop testing concepts extend beyond individual homes to citywide distribution networks. Water loss from deteriorating underground pipelines is a major global issue. Non-revenue water (NRW), water that is produced and purified but lost before reaching customer meters, exceeds 120 billion cubic meters annually across the globe, costing water utilities approximately $39 billion each year.
In poorly maintained networks, water loss rates can exceed 35% in developed countries and over 50% in developing regions. Even in modern municipal networks, sudden night-time pressure spikes can rupture weak pipe walls when consumer demand drops.
To combat water loss, municipal water managers divide pipe networks into District Metered Areas (DMAs) serving 2,000 to 3,000 service connections. By placing Pressure Reducing Valves (PRVs) and continuous transducers across these isolated zones, utilities can regulate baseline pressure and track night-time pressure drops.
For instance, implementing automated pressure management in large municipal systems has been shown to reduce pipeline burst rates by up to 93%, dropping failures from 3,000 down to 200 per year while preventing millions of gallons of water loss daily.
An unexplained utility increase without an obvious puddle can also point to a hidden water issue at home. Our article on a high water bill with no visible leak outlines practical places to investigate.
Synergistic Sensing: Combining Pressure and Acoustic Logs
While pressure drop monitoring quickly identifies that a section of pipe is losing fluid, it cannot always pinpoint the exact physical location of a tiny breach underground. That is where synergistic sensing comes into play.
By pairing continuous pressure sensor arrays with high-frequency acoustic emission sensors, technicians combine the strengths of both technologies:
- Pressure Transducers: Instantly capture transient hydraulic pressure drops caused by medium-to-large line ruptures across large network segments.
- Acoustic Loggers: Detect high-frequency structural noise created by small pinhole leaks spraying into surrounding soil.
This dual-source approach allows plumbers to locate hidden underground leaks beneath concrete slabs and driveways with precision. Homeowners who notice the warning signs of a tiny copper-line breach can use our guide to pinhole leaks in copper pipes to better understand potential causes and next steps.
Frequently Asked Questions About Pressure Drop Leak Detection
How does pressure drop leak detection work on residential water lines?
A technician isolates a specific section of domestic plumbing by closing shutoff valves, attaches a digital pressure transducer, and charges the line with water or air. Once stabilized, the pressure gauge is monitored over a timed window. A continuous drop in static pressure confirms fluid is escaping from the isolated loop.
What is the formula for calculating leak rate during a pressure decay test?
The leak rate is calculated using the formula $qL = V \times (\Delta P / \Delta t)$, where $qL$ is the leakage rate, $V$ is the internal volume of the isolated pipe, $\Delta P$ is the pressure drop measured, and $\Delta t$ is the total elapsed time of the test.
How do temperature changes cause false positives in pressure drop tests?
When air or gas inside a pressurized pipe cools down, its density and pressure naturally drop according to thermal gas laws. If a line is filled with warm air and tested in cold soil, the drop in pressure from cooling can mimic an active physical leak.
What is the difference between a pressure drop test and a pressure rise test?
A pressure drop test pressurizes the inside of a pipe above atmospheric pressure and watches for a loss of pressure. A pressure rise test places the internal chamber under a vacuum and watches for an increase in pressure caused by external air entering through a leak point.
How do you distinguish between outgassing and an actual pipe leak?
When plotting pressure change over time on a graph, an actual physical leak creates a constant, straight linear line as pressure changes. Outgassing from materials releases gas that slows down over time, creating a curve that tapers off toward a stable level.
When should I choose pressure drop leak detection over helium tracer gas testing?
Pressure drop testing is ideal for fast, non-destructive, and cost-effective evaluation of whole plumbing loops, water lines, and gas systems. Helium tracer gas testing is typically reserved for delicate manufacturing, hermetic seals, or specialized laboratory equipment requiring sub-microscopic detection.
What tools are needed to perform a pressure decay test in Columbia, SC?
A proper test setup requires isolation valves, a calibrated digital pressure gauge or transducer, a regulated air or nitrogen supply manifold, bleed off valves, and data recording equipment to log pressure stability over time.
Can a pressure drop test detect small pinhole leaks or slab leaks?
Yes, hydrostatic pressure drop testing is sensitive enough to detect minute pinhole leaks under concrete slabs because water is non-compressible. A tiny loss of liquid volume causes a noticeable drop on a digital pressure gauge. Homeowners noticing warm floors or foundation dampness should watch for common slab leak warning signs and consult local professionals to determine expected repair procedures.
How does pressure management reduce non-revenue water loss in municipal networks?
By installing automated pressure reducing valves across isolated water zones, utilities lower excessive baseline water pressure during off-peak night hours. This reduces background leakage volume and prevents sudden pressure surges that cause main breaks.
Should I attempt DIY pressure decay testing or hire a professional plumber in Lexington, SC?
Basic static pressure gauge checks on garden hose bibbs are easy for homeowners. However, isolating internal supply lines, pressurizing pipes safely without exceeding fixture limits, and accounting for thermal distortion require professional tools and expertise. Evaluating the pros and cons of DIY attempts versus professional leak detection helps ensure long-term system integrity.
Conclusion
Pressure drop leak detection is one of the most reliable, non-invasive diagnostic tools available for verifying the health of residential, commercial, and municipal piping systems. By systematically isolating line segments, pressurizing them safely, and allowing adequate time for thermal stabilization, technicians can confirm whether a pipe network is tight or leaking behind walls and under concrete.
While basic diagnostic steps are easy to understand, accurately troubleshooting pressure changes caused by thermal shifts, material expansion, or faulty isolation valves requires specialized equipment and training. If safety concerns arise, specialized high-precision transducers are needed, major plumbing systems are involved, or you are unsure whether a pressure drop indicates a real leak, it is best to consult a licensed professional.
Franklin Plumbing & Drain Cleaning serves homeowners and businesses across Columbia, South Carolina; West Columbia, South Carolina; Lexington, South Carolina; Blythewood, South Carolina; Irmo, South Carolina; Elgin, South Carolina; Chapin, South Carolina; and surrounding areas. We back our work with a 100% satisfaction guarantee. To protect your property from hidden water damage, contact our professional leak detection technicians to schedule an evaluation.

professional
drain cleaning

highly
recommended

through
repairs

quality
work